vintagebrassshopdesignstudiowebsitebanner.jpg

Vintage Jewelry Making | Oxidized Brass Jewelry Findings | Vintage Brass

Studio Home Page
Filigree Wrapping
Just Glue It!
Vintage Bracelets
Old Connectors
Old World | Gothic
Historical Themes
Design Ideas I
Design Ideas II
Design Ideas III
Swarovski Crystal Color Charts
Swarovski Crystal Size Chart
Vintage Jewelry Findings Gallery

2518LayeredBrassSetting.jpg

This lovely 25/18 filigree brass setting was made by just gluing 3 different pieces of oxidized brass together with E6000 glue. There are limitless designs you can make by just layering together various brass components.

These Findings Are Used To Create The Bracelet Shown At The Right

DragonflyWrappedPendant.jpg

OXIDIZED BRASS...

JUST GLUE IT! 

Create heirloom quality jewelry in just 3 easy steps!

Jewelry making with oxidized brass is a rewarding craft that inspires you to release your creativity!

Most of our oxidized brass pieces are left with an unsealed, natural matte patina which provides a porous surface allowing for greater adhesion when gluing pieces together. It is 100% free of oils, polishes and waxes allowing the designer to create a number of finishes. 

The instructions below describes two of the most popular (and easiest :) finishing technics. However, there are several other finishing technics that we describe in other areas of our design studio.

DIYSwarovskiConnectors.jpg

TIP! Layering different colors or tones of patina brass (as shown above and in dragonfly pendant above/center) will add dimension to your pieces. This provides visual separation and really brings out the detail in each layer of your design.

Learn To Make This Bracelet On Our "Cuff Bracelets" Page

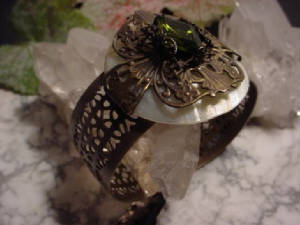
 Gorgeous Solid Brass Jewelry

Created Quick And Easy With E6000 Glue  

Stunning Heirloom Quality

With Hand Oxidized, 100% Natural Patina Brass

Just 
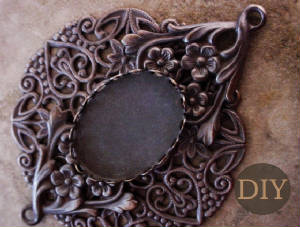
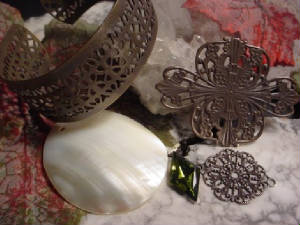
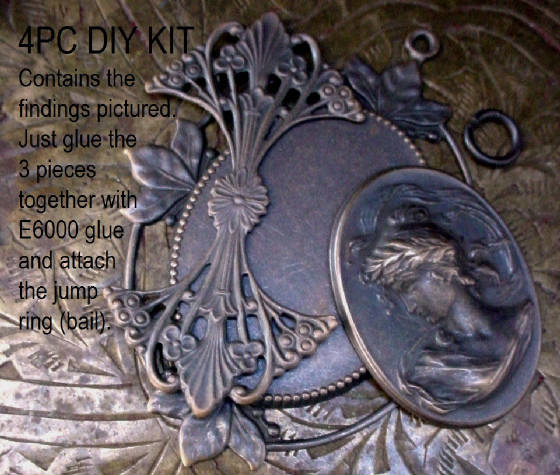
Glue It!...Easy As 1-2-3 

STEP 1. Select the findings you want to create your layered brass design. The cameo pendant illustrated here is available in a DIY Kit at my etsy shop. Note: All of the findings shown below are also available seperately at my shop.

diyromannouveaucameopendant.jpg

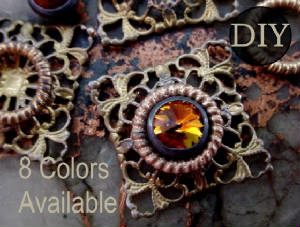
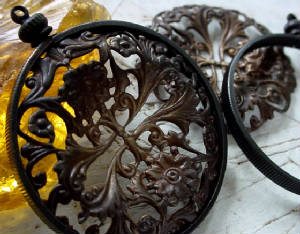
STEP 3 (Optional): If desired, lightly buff with xfine steel wool (#000) to expose the desired amount of brass highlights as shown in the photo at right.

Note: If you would like me to include a piece of steel wool with your order, just include a note to seller when you check out.
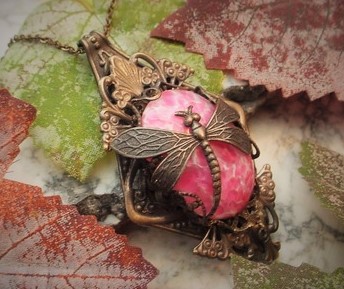
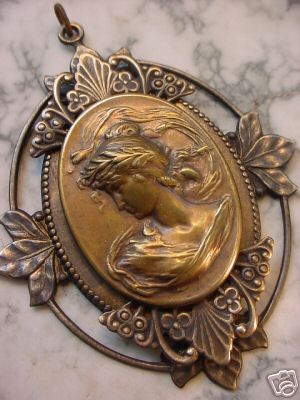
diyromannouveaucameopendantassembled.jpg

  STEP 2: Glue the findings together as shown above with E6000 glue. Allow to dry 24 hours to completely cure. Then attach the jump ring (bail) to the top.

If desired, you can stop here and leave this pendant with it's gorgeous dark antique bronze tone patina or you can proceed to step 3.

0abtothis.jpg

cameonecklace.JPG

Finishing Techniques

DragonflyWrappedPendant.jpg

 Multi Tone Finish

You can easily create several tones of brass by just buffing more (or less) with your xtra fine (#000) steel wool as illustrated in the pendant above, necklace at left and the filigree below. 

OxidizedbBrass39mmCoinBezel.jpg

Above oxidized black brass 39mm coin bezel and two tone filigree available at my etsy shop.


vintagebrassshoplogovisitmyetsyshop.jpg